Using Custom per-User Variables with VisualGDB
This tutorial shows how to share a VisualGDB project between several users and define some settings such as Linux user name independently for each user.
Before we begin, ensure that VisualGDB 4.0 or later is installed.
- First of all, create a new VisualGDB Project for Linux by following this tutorial. Note that the techniques described in this tutorial apply to all VisualGDB Project types (e.g. Windows, Android or Embedded).
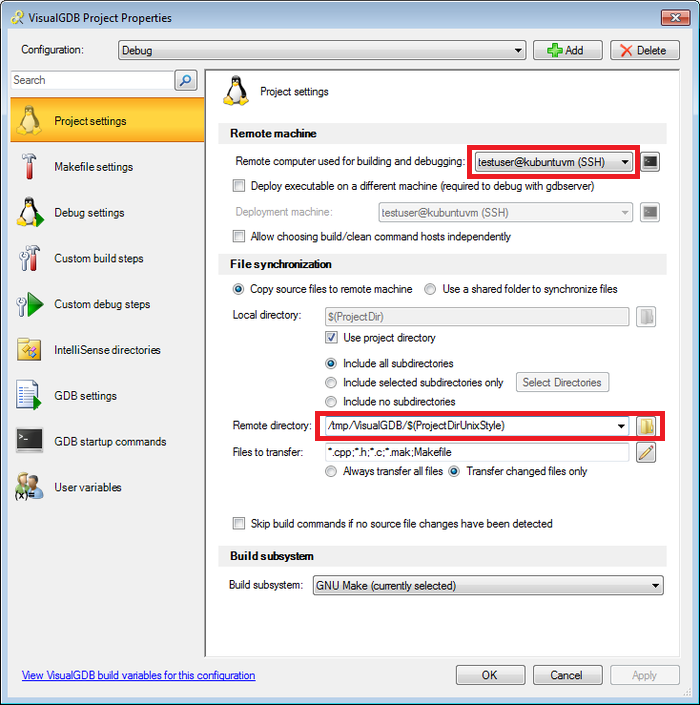
- Once the project has been created, ensure that you can build and debug it. You will notice how VisualGDB connects to the Linux machine, uploads the source files and builds your project remotely. Right-click on the project node in Solution Explorer and select “VisualGDB Project Properties”. Note the remote computer used for building/debugging and the remote directory where the files are copied:
- Both those settings are stored in an XML file with the name composed according to the following template: <ProjectName>-<ConfigurationName>.vgdbsettings. If you check in this file to your source control system (e.g. SVN or GIT), each user will have the same settings. If several users are building/debugging projects at the same time, this can lead to conflicts. We will change the settings the following way:
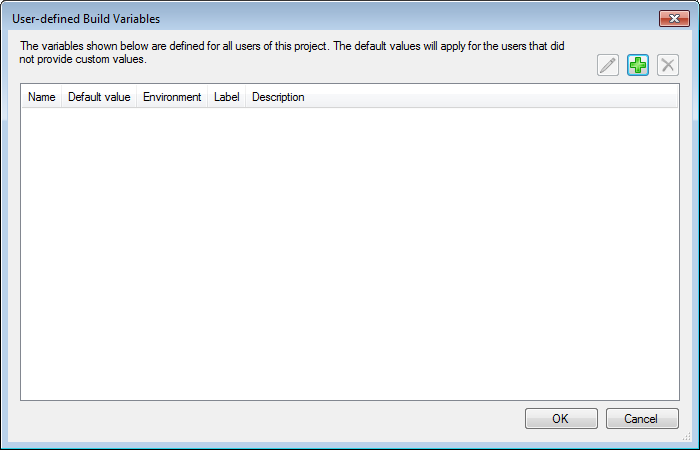
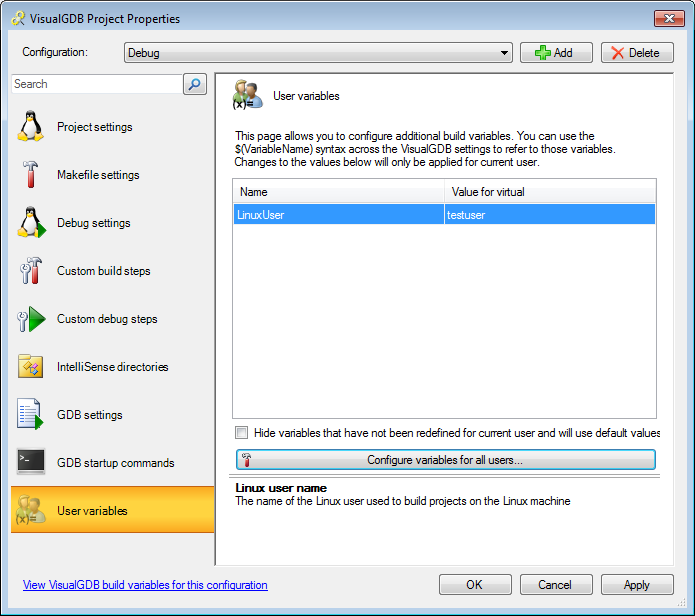
User 1 User 2 Linux machine kubuntuvm kubuntuvm Linux user name testuser linuxuser2 Remote path /tmp/VisualGDB-testuser/… /tmp/VisualGDB-linuxuser2/… - Go to the UserVariables page. Note that currently there are no per-user variables defined. This means that all settings are the same for all users:

- Click “Configure variables for all users”:
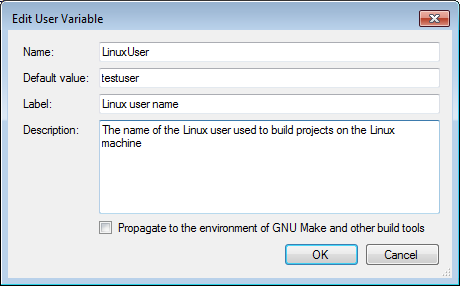
- Click on the “add” button. Create a new variable called “LinuxUser” that will have a default value of “testuser” and optionally provide a user-readable hint:
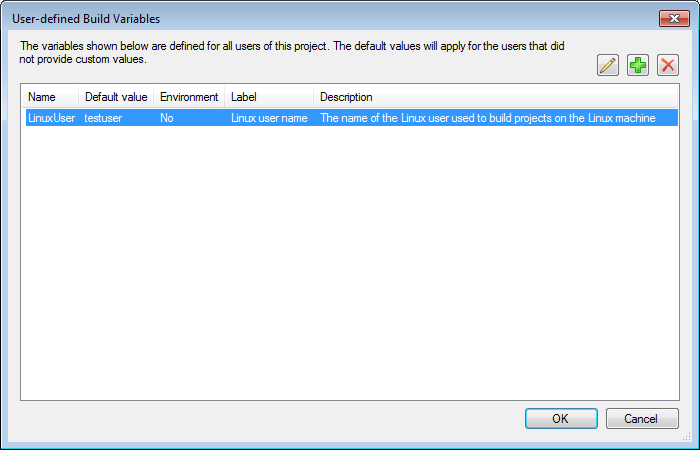
- When you press OK, VisualGDB will create a new variable and display it in the list:
- Press OK to go back to the VisualGDB Project Properties dialog. Note how the label and description you entered are displayed below:
- Now when the variable has been added, it’s time to reference it from various project settings. Go to the Project Settings page, click on “remote machine” and select “specify settings based on per-user variables”:
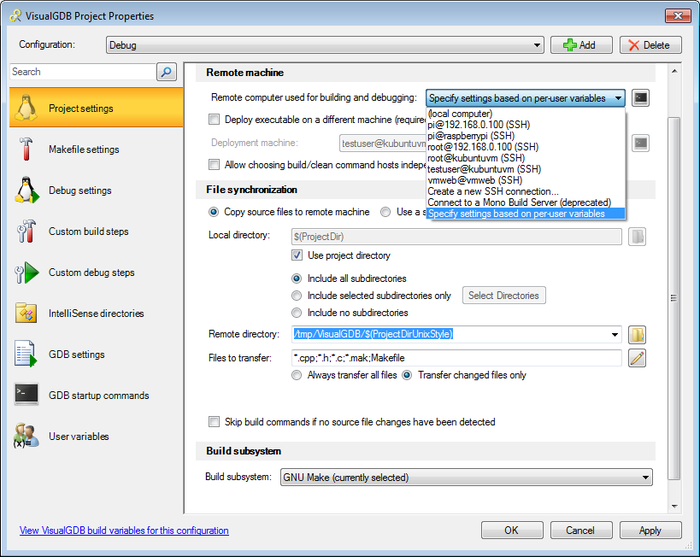
- As we want the computer name to be fixed, simply enter it in the corresponding field.
Select $(LinuxUser) as the user name.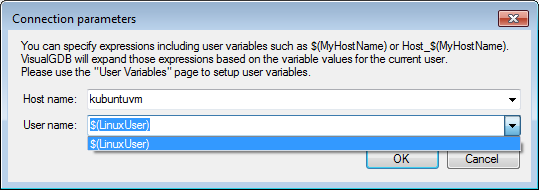
- Now change “remote directory” to “/tmp/VisualGDB/$(LinuxUser)/$(ProjectDirUnixStyle)”
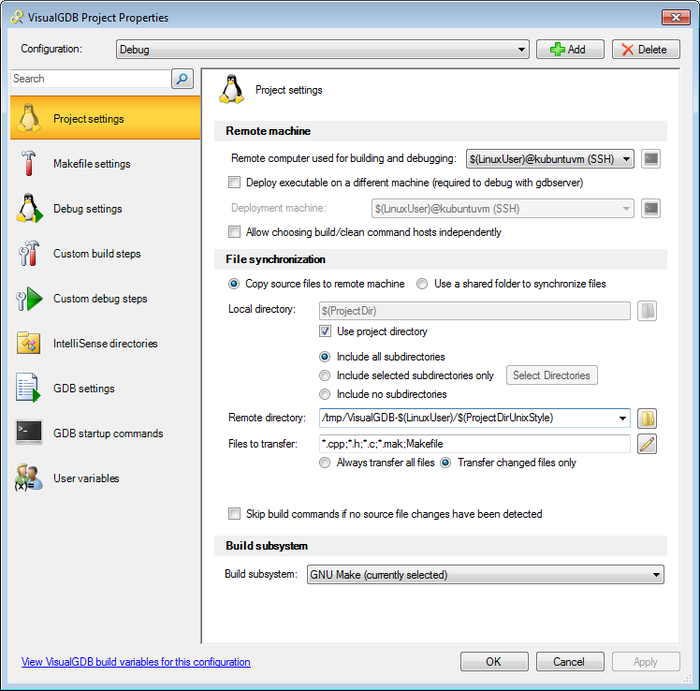 Warning: If you place per-user directories inside a common directory, ensure that all users have write access to all subdirectories.
 - Press OK to save the settings. Add the project files (including .vgdbsettings file) to your source control system. Check out the project files under a different user account (or simply open the project from the same location if you are just testing things). As VisualGDB caches remote include directories for each user independently, several IntelliSense errors will appear. We will fix them during the next steps. Open VisualGDB Project Properties dialog and go to the User Variables page:
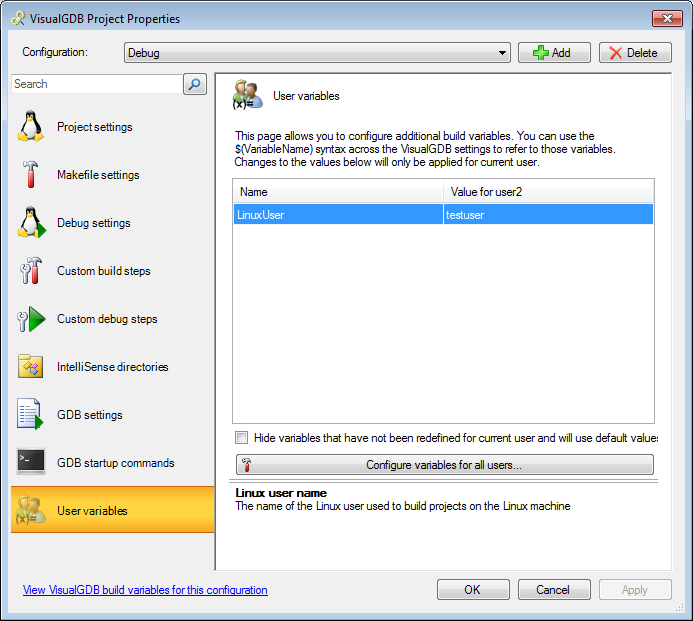
- Change the value of LinuxUser to the Linux user name you want to associate with the current Windows user. In this tutorial we will enter “linuxuser2”.
- Now it’s time to fix IntelliSense. Go to the “Makefile Settings” page and touch the “Preprocessor macros” field (e.g. add a space at the end and then remove it by pressing backspace):
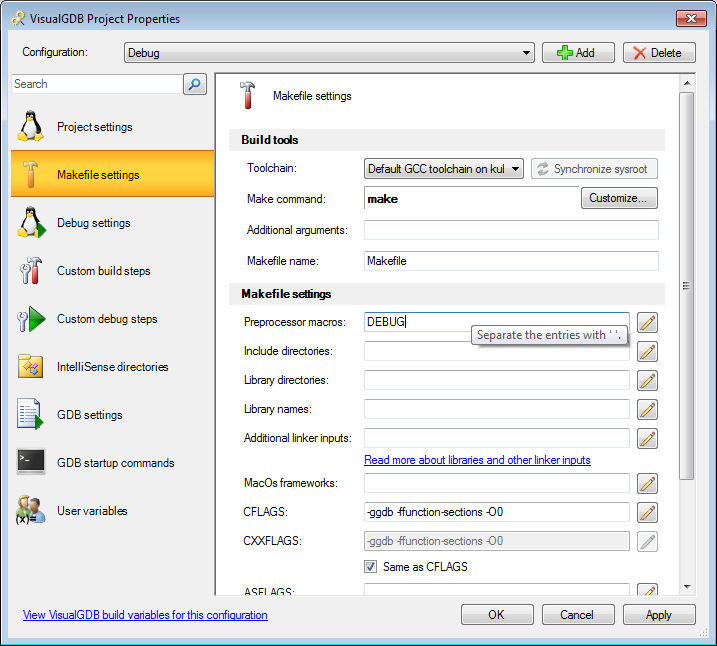
- Click “apply” or “OK” to let VisualGDB analyze the project include directories and preprocessor macros and setup IntelliSense accordingly. If you have not connected to the Linux machine from this user account before, VisualGDB will ask if you want to create a new SSH connection:
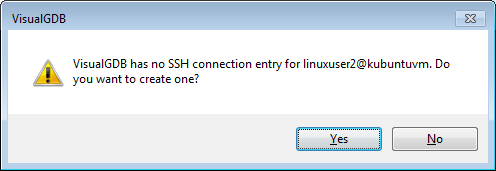
- Press “yes” and enter the password for your Linux user so that VisualGDB can create a connection:
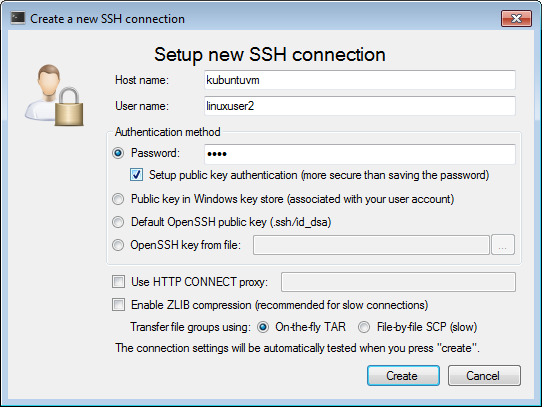
- When you press “Create”, VisualGDB will check all your settings, download missing include directories and configure IntelliSense to automatically index them:

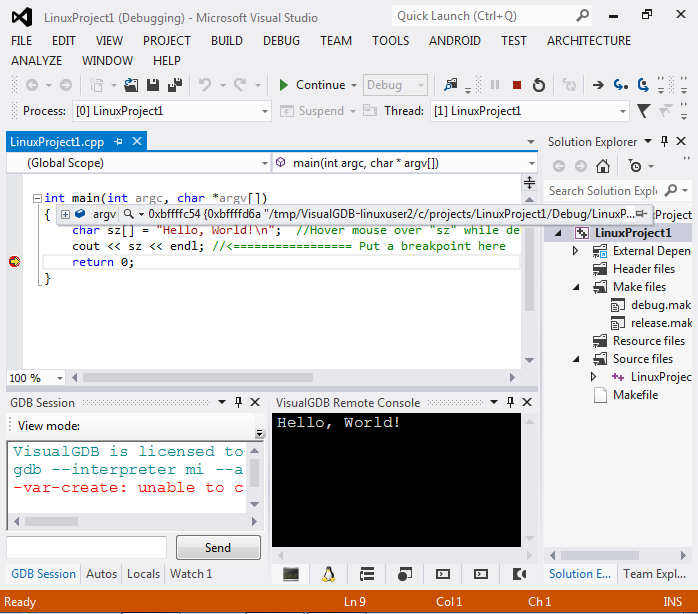
- Once VisualGDB has completed applying your settings, you build your project and start debugging it. Note how the project was deployed under a directory containing your Linux user name:
- All settings specific to the second user (user2 in this tutorial) have been saved to a file with the following name: <ProjectName>-<ConfigurationName>.vgdbsettings.user2.user. This is a simple text file having the following contents:
#Generated by VisualGDB. Contains per-user values for custom build variables.
LinuxUser := linuxuser2
As the file name contains the user name, you can check in the file into your source control system without causing any collisions between different users. You can also use third-party tools compatible with GNU Make syntax to read or modify the per-user settings files.


